Origami Helper
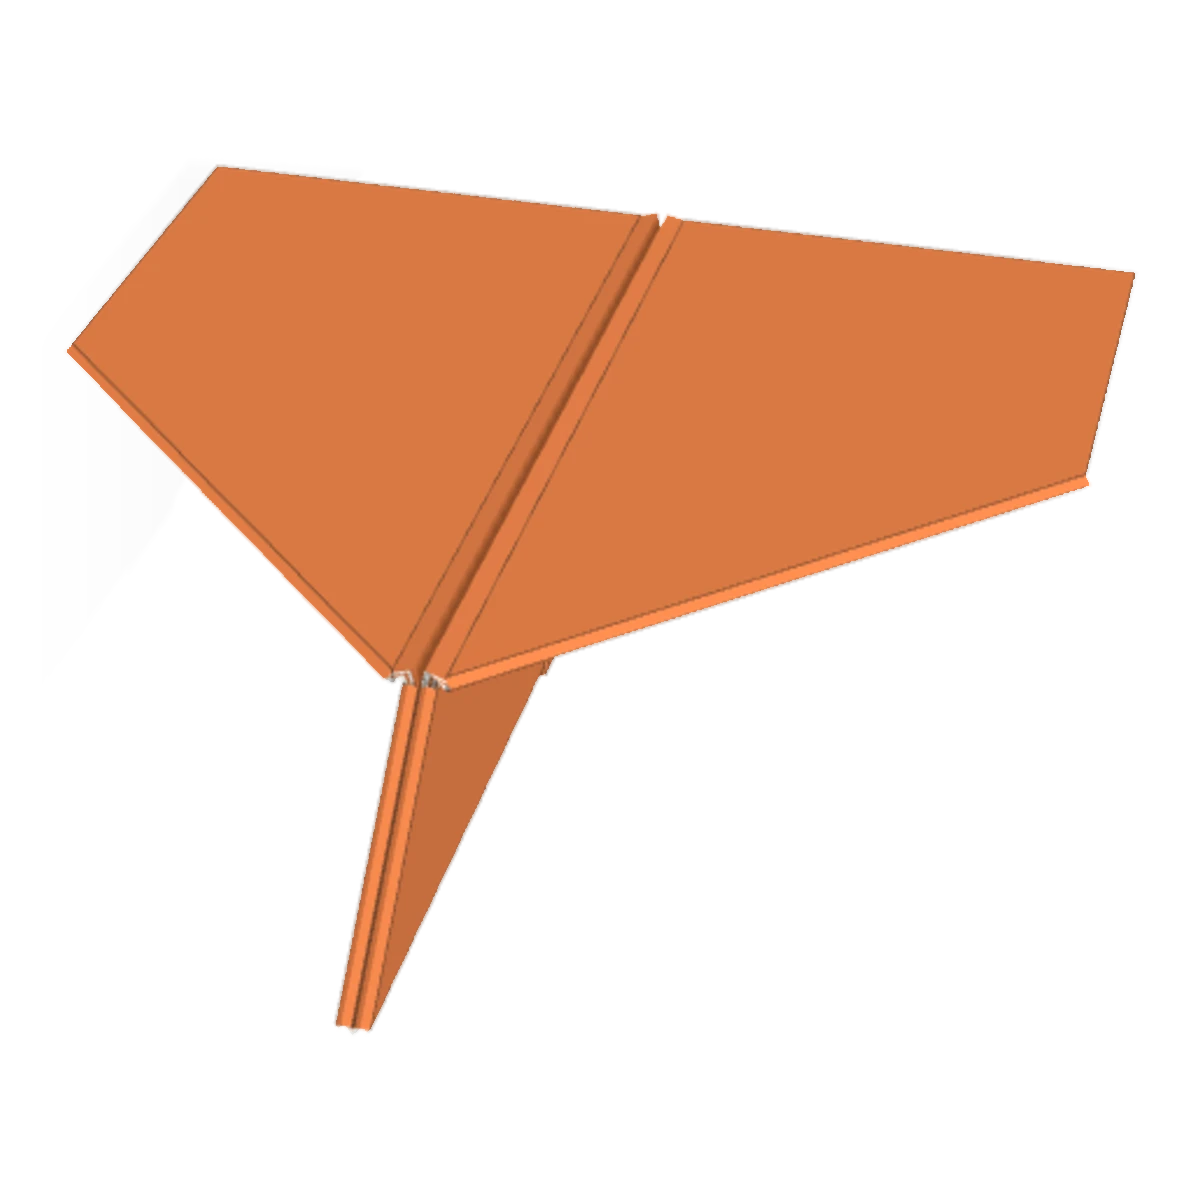
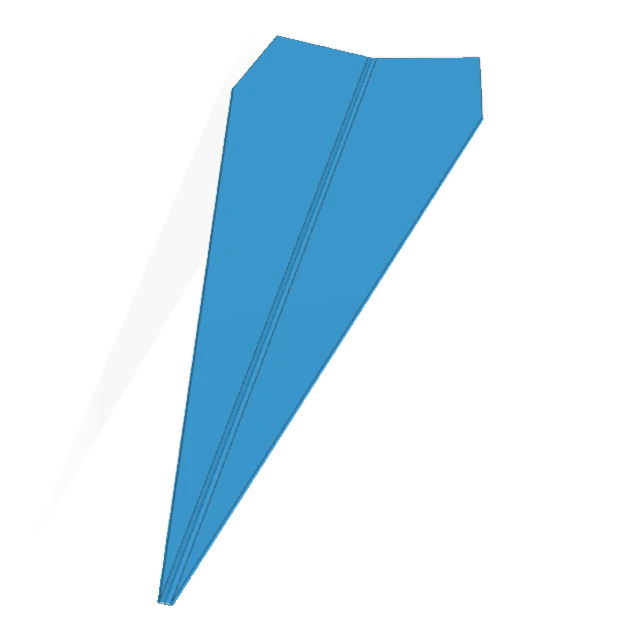
How to fold a Heso Glider (Locked-Nose Paper Airplane)
- Difficulty
- Medium
- Steps
- 14 steps
- Paper
- One sheet of A4 paper
- When finished
- Tilt the wings
A paper airplane whose folded-down nose is locked by a small triangle (the “heso”, or belly button). Folded from A4 or Letter paper.
Steps
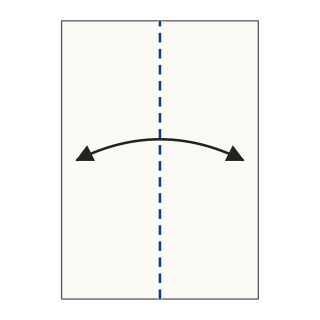
Step 1Place a sheet of A4 or letter paper upright. Fold it in half lengthwise, then unfold to make a center crease.
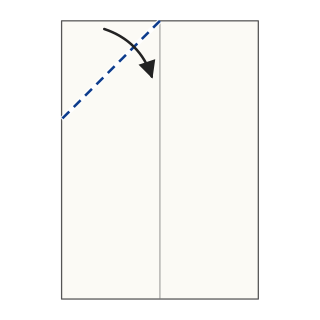
Step 2Fold the top left corner in to the center crease.
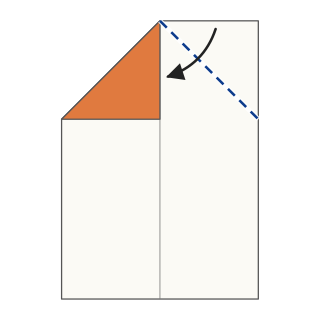
Step 3Fold the top right corner in to the center crease too.
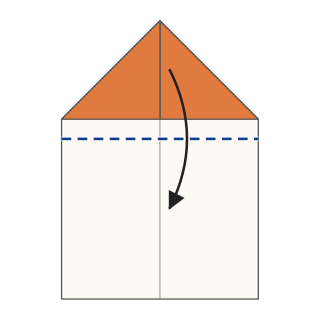
Step 4Fold the point down along a line about a finger's width (2 cm) below the edges of the triangle.
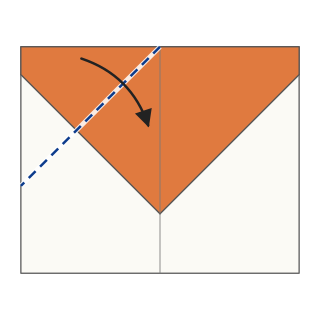
Step 5Fold the new top left corner in to the center crease.
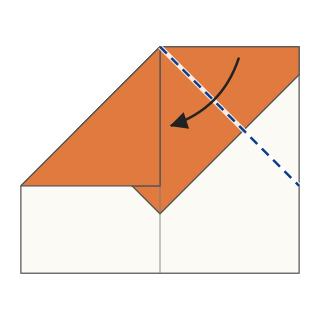
Step 6Fold the top right corner in the same way. A small triangle tip peeks out below the flaps.
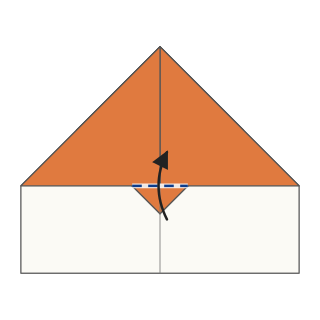
Step 7Fold the small triangle up over the two corners to lock them in place.
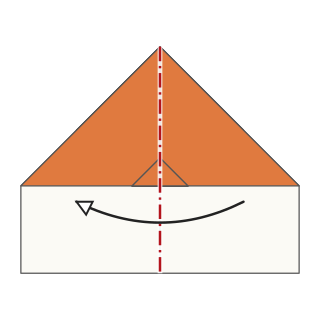
Step 8Mountain-fold the right half behind along the center crease, so the small triangle stays on the outside.
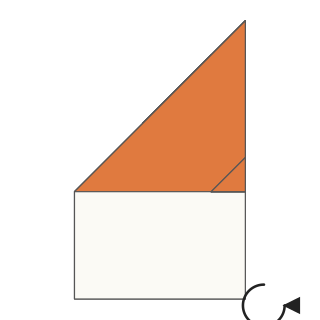
Step 9Rotate the paper so the nose is on the right and the folded edge is at the bottom.
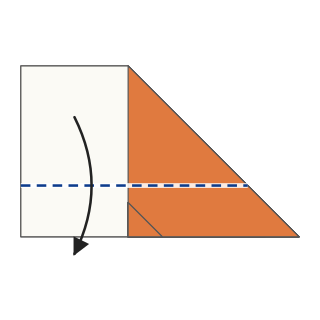
Step 10Fold the front flap down, parallel to the bottom fold, leaving a body about 3 cm tall. This is the first wing.
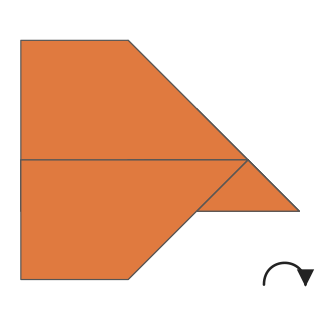
Step 11Turn the paper over.
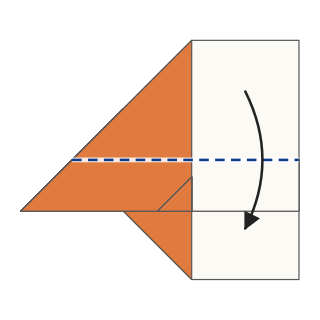
Step 12Fold this wing down at the same height.
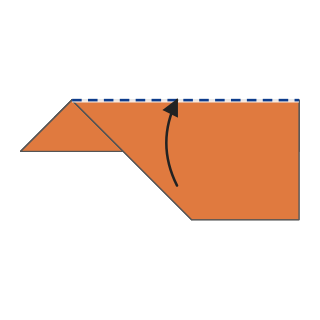
Step 13Lift the front wing until it stands at a right angle to the body.
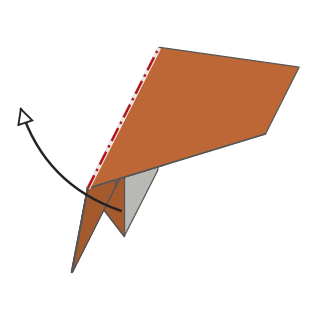
Step 14Open the other wing the same way so both wings are level. The glider is finished.
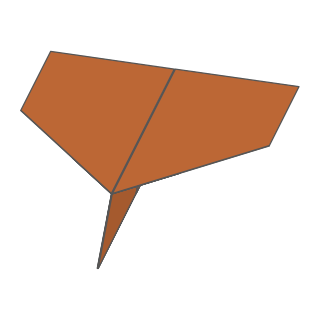
Finished