

How to fold a Hakama
- Difficulty
- Medium
- Steps
- 26 steps
- Paper
- One square sheet
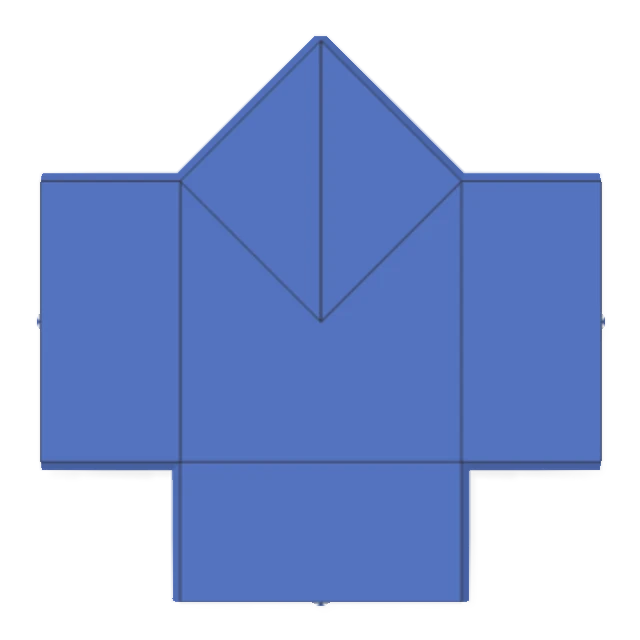
From the same base as Yakko-san, open the side squares wide into a hexagon, then fold it in half while pinching both ends down into legs. It fits under a Yakko-san.
Steps to fold a Hakama (26 steps)
The Hakama is a traditional model folded from one square sheet in 26 steps (difficulty: Medium). Along the way you make the yakko base. No square paper? Start with the steps for making a square from A4 or Letter paper.
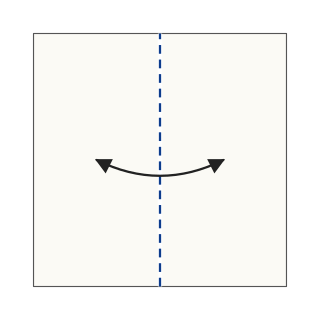
Step 1Start with the white side up. Fold in half side to side, crease, and unfold.
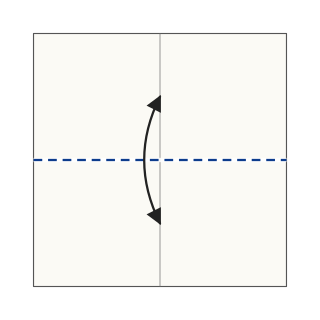
Step 2Fold in half top to bottom too, crease, and unfold.
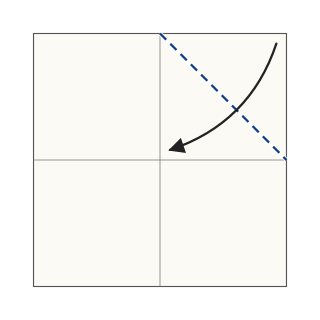
Step 3Fold the top right corner to the center, where the creases cross (first blintz fold).
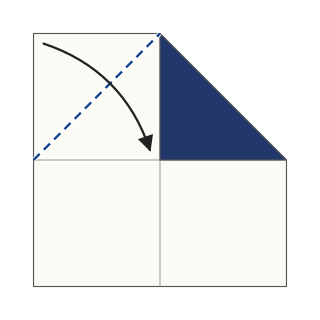
Step 4Fold the top left corner to the center too.
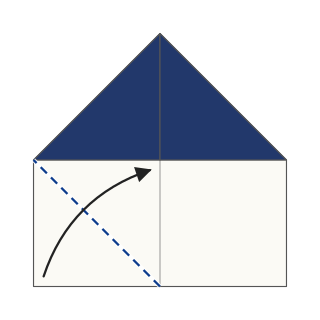
Step 5Fold the bottom left corner to the center too.
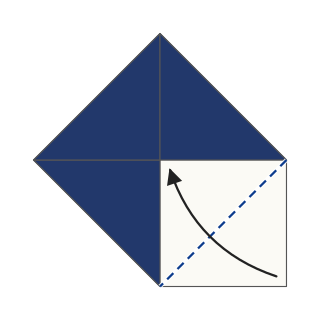
Step 6Fold the bottom right corner to the center too.

Step 7Turn the paper over.
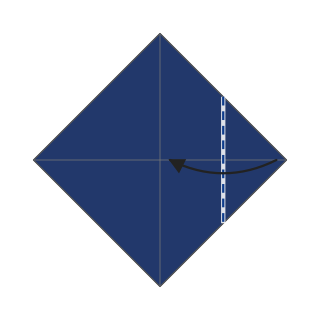
Step 8Fold the right corner to the center (second blintz fold).
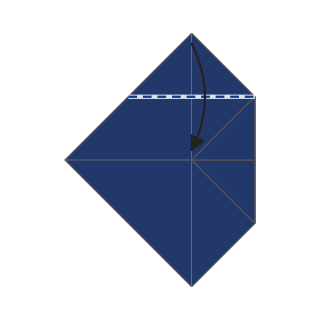
Step 9Fold the top corner to the center too.
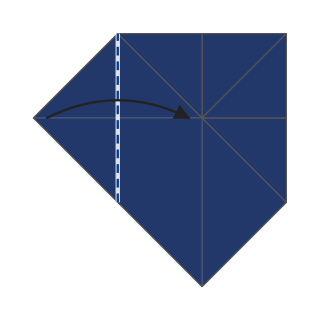
Step 10Fold the left corner to the center too.
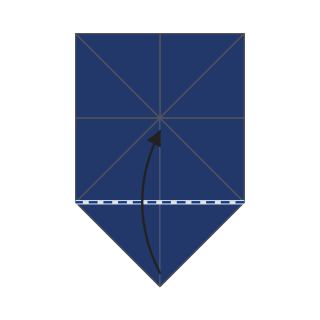
Step 11Fold the bottom corner to the center too.
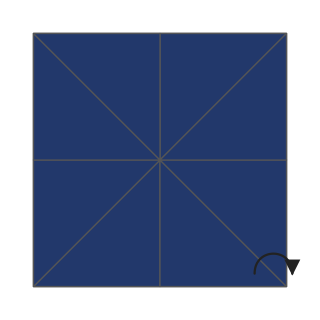
Step 12Turn the paper over again.
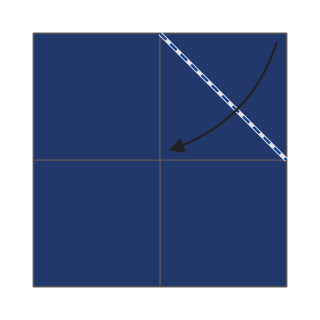
Step 13Fold the top right corner to the center (third blintz fold).
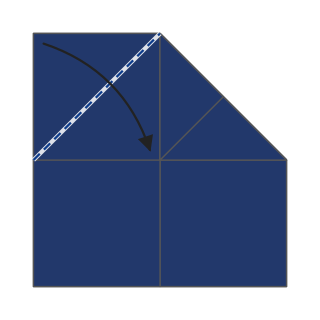
Step 14Fold the top left corner to the center too.
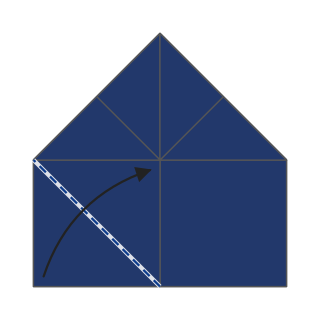
Step 15Fold the bottom left corner to the center too.
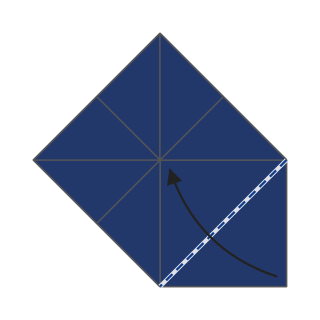
Step 16Fold the bottom right corner to the center too.

Step 17Turn the paper over. There are four small squares, and each has a slit (two paper edges meeting) running from the center to its outer corner.

Step 18Put a finger into the slit of the top square, spread it open, and bring the center corner up to the top corner, squashing the square into a rectangle.
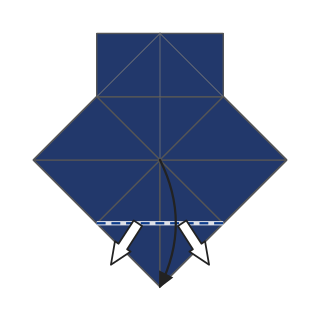
Step 19Open and squash the opposite (bottom) square the same way. This is the yakko base.
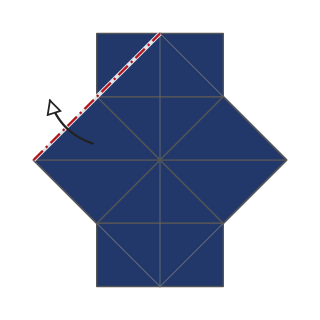
Step 20Now open the left and right squares wide to make a hexagon. First, pull out the top-left triangle tucked behind the left square.
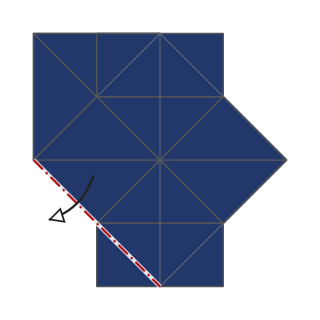
Step 21Pull out the bottom-left triangle the same way.
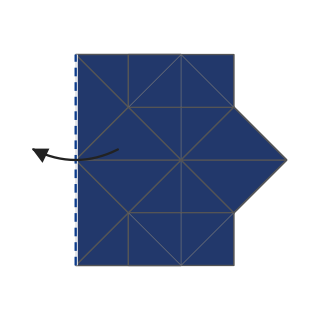
Step 22Open the front part of the left square out to the left and flatten it. The left side becomes a big triangle.
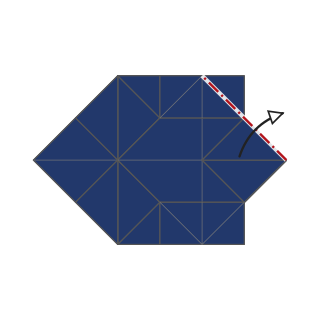
Step 23Open the right square the same way. Pull out the top-right triangle from behind.
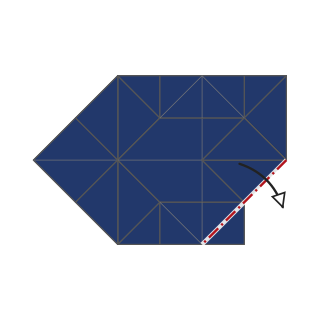
Step 24Pull out the bottom-right triangle too.
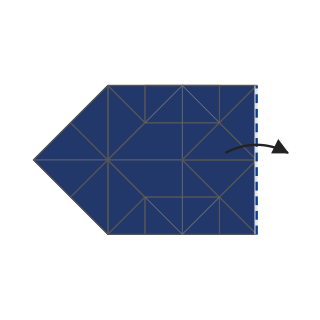
Step 25Open the front part of the right square out to the right and flatten it. Now it is a hexagon.
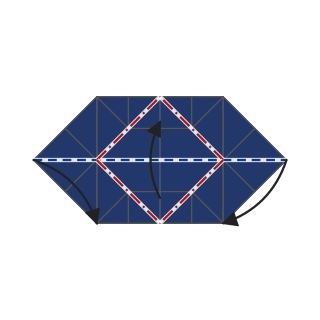
Step 26Pinch the left and right ends so they fold downward, while folding the bottom half up along the middle crease. The hakama is finished.

Finished
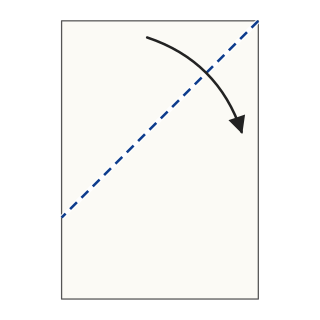
Preparing paper
More models
-

Car
-

Cat Face
-

Paper Cup
-

Heart
-

Samurai Helmet
-
Dart Paper Airplane
-

Penguin
-
Piano
-

Pumpkin
-
Sailboat
-
Water Balloon Yo-yo
-
Water Balloon
-

Cicada
-

Goldfish
-
Masu Box
-

Box with a Lid
-

Fortune Teller
-

Panda Face
-
Heso Glider (Locked-Nose Paper Airplane)
-
Rabbit Face
-
Ninja Star
-
Swan
-
Twin Boat
-

Pinwheel
-
Yakko-san
-

Boat with Sail
-

Butterfly
-
Paper Crane
-

Crane with Legs
-

Jumping Frog